Showing posts with label Gail's Kitchen. Show all posts

Tuesday, July 9, 2013

Style at Home: Celebrating Canadian Designers


Room Design &  Photo by:  Carol Reed

There's truly nothing I'm prouder of than being Canadian so I was thrilled to be invited to share my favorite space last month for a special Canada Day feature on the Style at Home website.

You can read all about why this is my favorite client space here.  It was an easy decision to chose Gail's kitchen for all the reasons that are mentioned in the article.  Further to that on a personal level it was the first project I documented in its entirety on social media from initial meeting to magazine cover - I blogged and tweeted the progress. To eventually see the completed kitchen on a recent Style at Home cover was such a perfect finale. (for more posts on this project you can search "Gail's Kitchen" in the side bar).

Not only is this room one of my favorite spaces, this image is one of my favorites too - prior to the extensive reno this is a view that wasn't even possible due to a large catwalk that cut thru the cathedral space and hovered over the eating area.  Removing the catwalk was the very first thing on my agenda and it was impactful!  Exposing this cathedral ceiling added great volume and light, and,,,,this incredible sightline from the loft space above.

Thanks to Elaine Song for putting together such an wonderful feature, I thoroughly enjoyed reading the inspiration behind the 10 other celebrated Canadian spaces.


Tuesday, January 8, 2013

Style at Home: Gather Around


Style at Home Magazine February 2013.  Photography by Donna Griffith.


The publication of Gail's kitchen in the February issue of Style at Home is an exciting full-circle moment of sorts. Its the first project since having this blog that I've documented the process from initial meeting to magazine right here on the blog and on twitter. 

Its been a long process to complete this circle including a year since the time of the shoot to publication.  Gail and her family have been enjoying this new kitchen (and also the renovated family room and adjoining mudroom) for two years now and she loves it as much, if not more today then when she moved into it in the late fall of 2010.   I've enjoyed a glass of wine and delicious food at this island several times over the past two years and to see the joy in Gails eye's as she thrives in this new space is truly gratifying for me.   The absolute best part of any job for me is when I actually see the completed space being used just as I had envisioned in even my earliest sketches.  Its rare to actually see her kitchen empty like this, as its the hub of this home and always, always buzzing.

Without a doubt the most satisfying compliment for me is when visitor's tell Gail, even though its all new and is in a addition to the house, that they feel like this kitchen has always been there, that it feels like it originally belongs to their century old house.  And that, for me, is exactly what I was hoping to achieve.

You can check out the full feature in the current issue on-line to digital subscribers at zinio.com and on news stands this week across Canada.  I absolutely love how photographer Donna Griffith so beautifully captured the space and how Ann Marie Favot's simple styling had the perfect touch.  I'll be posting some more photos from my own portfolio shoot (also shot by Donna) at Gail's in the weeks ahead. 

Thank you Donna, Ann Marie, Bethany and the entire team at Style at Home!

You can check out older posts on Gail's kitchen thru the links below:


Wednesday, September 28, 2011

Gails' Kitchen: Sneak Peek


I don't think most people realize how much time will elapse from the day they decide to take on a renovation project to the day you can actually move your belongings back into the space, including all your own personal touches, and,,, begin living in it.   It can take even longer for the final finishing touches to be put in place and for those much dreamed about "after" photos to be taken.  Gail's kitchen was a project I started in January 2010, you can read all about the project and see before photos here, design drawings here , site progress here, and here. The project involved the renovation of not only her kitchen but an adjoining mud room and family room.   Construction wrapped up 10 months after my initial meeting with Gail, and just in time for her to use her brand new kitchen for Thanksgiving 2010.  But even at that point there was still a short list (ok, she might have called it a long list) of small details still to be completed. 

Flash forward almost a year later and I've finally had the chance to return to Gail's and take some 'after' photos.  (This could have happened sooner but coordinating shoots like this in the summer months is just too challenging.)  Its been an amazing experience to return all these months later and see Gail still gushing over her new kitchen like it was just revealed to her yesterday - she's literally giddy with disbelief and excitement that this is 'her' kitchen.  Its so satisfying to me to see the pure joy on her face when she's in this space and to listen to her tell me of all the parties and special meals that have been experienced.

Having any of my projects professionally photographed, or even photographed by myself, requires a huge investment of my own time (and money!) as well as the complete cooperation of the homeowner.  In all honesty its a challenge to find this time.   It can also take a couple of months to get into a photographer 's schedule depending what time of year it is.  Once scheduled,  prior to a shoot I'll spend a day picking up fresh flowers and food accessories and then I'll spend the next day at the house making sure everything is in place and camera ready.   The third day is spent at the house overseeing the shoot.  Did I mention,,,,,,,these after photos,,, require a huge amount of time!!??  

I was thrilled to work with the super talented photographer Donna Griffith just two weeks ago photographing 'after' photos of Gail's kitchen project.  I don't even have the final photos yet but I thought I'd share a sneak peek at some of the beautiful details that have come to life from all those design sketches and visions I had in my head almost two years ago.  Its a huge room and these images are literally a small 'peek',  capturing only a fraction of the complete space.

Please note the images below are just a few of my own candid shots, not the photographers.


Here you can truly see the beauty and character of hand made subway tile.


As Donna said when she arrived,,,,"I just want to sit down and have breakfast".  I bought the topiaries to dress the table but everything else I set out on the table belongs to Gail.


A huge oversize lantern I had custom made for the two story space. 


Even a year later the timing still wasn't ideal.  There was a construction crew working on the pool deck in the backyard but they were so accommodating every time we asked them to move their tools out of view! 


All Photos:  Carol Reed


Thursday, September 23, 2010

Almost Afters: Gail's New Fireplace


Last Friday I attended my last official site meeting for Gail's Kitchen and Family Room renovation.  I started working on this project on Dec.11th, 2009 so its been a looong process seeing this new space evolve from paper to reality week after week.  This last meeting represented what I call substantial completion, meaning the construction is considered complete, and the homeowner moves back into her new space!!!  The crew packs up all their things and they move-on to another job site, returning as needed to finish off any outstanding small items.

When I was at the house early that morning, the guys were doing some final paint touch-ups, I didn't have the opportunity to take any 'after' shots because they were just about to start the big clean-up but I'll be back for a follow-up visit very soon.   One of my FAVORITE things in the space was the new family room fireplace and last week was the very first time I had seen it.  The fireplace itself is a new clean face model gas unit by Napoleon.  Since my previous visit the new surround and mantle had been installed so it was a bit of a 'reveal' moment for me when I walked in, and when I saw it there, I just stopped in my tracks and gasped! : )  The design concept for the fireplace had changed several times over the past couple of months....


Here are a couple of initial concepts,,,in each I had envisioned antique or reclaimed wood being used for the mantle.  It was an awkward space, to the immediate right was a window to the immediate left is a half wall with stairs to the basement and the fireplace wall is also the only wall in the room for the tv.


A short time later we discovered a stash of antique wood boards in the homeowners garage (located in an income property they own across the street).  Of course I went crazy over them and asked the contractor to make us a rolling door from the boards and.......if there was enough material I also wanted to use it for the fireplace mantle.


Then about a month later,,,,,the coppersmith visited the house to do a site measure for the new custom copper hood canopy I had designed.  He brought a few samples for me to review and as soon as I saw them I asked if he could also make the fireplace surround out of the same copper.  No problem he said (Oh I love to hear that!!!) so I sent him a sketch with dimensions....


Excuse the ugly 3D image, (this is why I prefer hand renderrings) but I used this 3D sketch to illustrate how I wanted the copper surround and the wood mantle to be built.  A seperate sketch had all the dimensions on it.   I emailed this to the copper smith and my contractor who was making the mantle.  Unfortunately my contractor called me to say there wouldn't be enough of the antique wood left over from the door so what was plan 'b' ?  I asked him if he could find some rough hewn, gnarly wood that was about 2" x 6",,,,,, and that was the last I heard from him.


A few days later I showed up for my final site meeting and this was what they had built.  I LOVE it!!!
  

The homeowner is over the moon about it, and seriously I wish this fireplace was in my own home.  Its rustic and contemporary and I have to say I've never seen anything else like it, my contractor hit it outta the park with this one.  The wood he used was rough-hewn douglas fir, the knots are absolutely gorgeous and have the same character as the loft grade natural oak floor.  When I took this photo it wasn't quite 100% finished yet, the mantle was about to receive one more light sanding and a coat of oil.  Then the copper surround gets a once over with steel wool to remove some of the black coating and bring out the copper, the steel wool also gives it a low lustre sheen.

I hope you enjoyed this little glimpse of what the 'almost' finished space looks like, I have to say its a dramatic transformation from what was once there and I can't wait to post all the after photos. 


Note:  When building a surround and or mantle for any gas fireplace, its critical to refer to the mfg's installation specifications where you'll find all the minimum clearances that must be maintained.  There are strict clearances that must to be adhered to with regards to the use of combustible and non-combustible materials when cladding the surround and there are various clearance requirements with regards to mantle projections.  Always follow the mfg's specs for your exact model.


All Photos:  Carol Reed


Tuesday, September 7, 2010

Upload: September 6th


The new look of Restoration Hardware Toronto.


Its been a couple of months since I posted an Upload,,,,with things so hectic before going away on vacation at the end of July I didn't have an opportunity to do one of these before we hit the road and then since returning I've been swamped trying to get caught.  I've dumped hundreds of photos off my Iphone in the meantime, here's a random look at what I've been up to including; some job site photos,,some great finds, some new finds, some things that insprired and some things that just made me smile.


 I popped into RH last week with a client and we stopped immediately in our tracks right inside the door, took a look around and asked if they were open?  It was really dark inside even though it was the middle of the day, but yes of course they were open but with a entirely new look!  The Toronto showroom had just undergone a complete overhaul, every inch of the store had been painted a dark warm grey, Restoration Hardware's Slate.  You'll notice in the top photo they painted out all the mouldings and railings to create a monochromatic look - I love this treatment, it gives a contemporary feel to traditional mouldings and is particulary ideal for creating a gallery look.  In fact, its a gallery look they were going for.  Gone are the soap displays, paint displays and various nick-nacks and toys, even the hardware is contained and artfully displayed behind glass.  They were still busy setting up displays and awaiting delivery and installation of lighting so in the meantime the store is pretty dark.


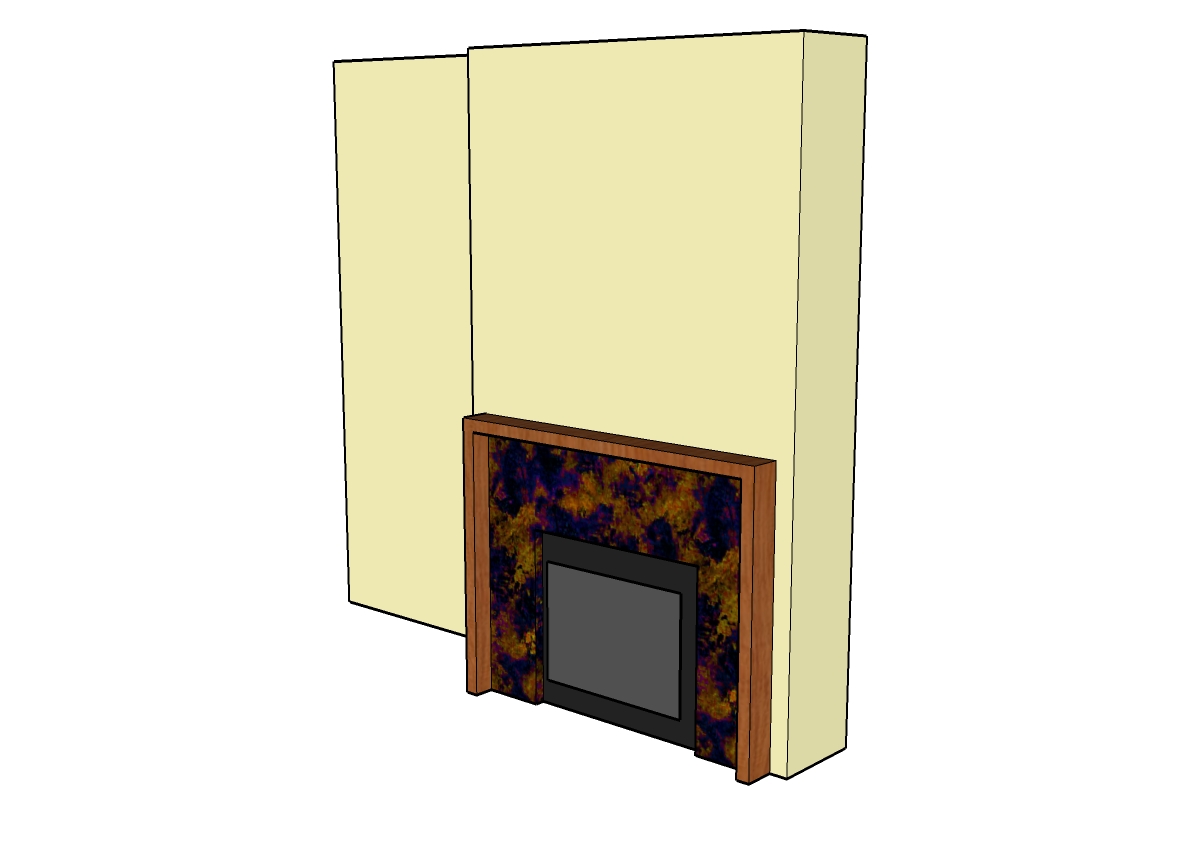
From an idea in my head more than 6 months ago,,,,, to a sample I approved in July,,, 


To installation day a few weeks later.......


In addition to the custom copper hood, the counters and backsplash were installed in Gail's kitchen while I was away on holidays.  All the finishing touches are happening this week so Gail can finally, finally, move in. : )


Sourcing some lighting for Gail's mudroom.  I've never met a schoolhouse fixture I didn't love..


A puurrrrfectly styled bookcase ; )


Halfway thru setting the table on the back deck as his highness keeps an eye for squirrels.  My new 'Soho' outdoor pillows from Tonic Living seen on the bench.


New exterior lighting for the urban rooftop deck project. Clean and modern looking it reminds me of the lanterns we're accessorizing with.  Fixture from Sescolite.


In addition to white and dark grey sunbrella pillows, we're having a few non-outdoor fabric pillows made for the rooftop deck which will be brought out for entertaining.  I selected these fabrics from Thom Filicia's collection for Kravet - large scale, graphic, gorgeous!


Speaking of graphic pillows...I was crazy for these quilted pillows that I saw on the East Coast, although you can't get more traditional that quilting - these geometric patterns have a modern feel to me, I'd love to see them in a clean contemporary space.  They weren't made locally however, they were imported from Thailand which tells me this is a look we'll be seeing a lot of.    


And these,,,,,folksy looking pillows, I regret not picking up a few of each!


I looked at lots of quilts when I was away but still didn't find 'the one' that I had to have.  Unlike most of what you come across in many of the touristy stores in Nova Scotia, the quilts in this shop were all locally made by hand and cost thousands of dollars each.


On our trip we ate these almost every day - they were local Indian Point mussels from Mahone Bay and were the best mussels I've ever eaten.  I make them at home all the time but I'd never had them like this before.  Every where we ordered them they were served the same way, steamed (usually in garlic and wine) and served with a side of melted butter and lemon.  Sooo good, I'll be making them this way at home now!


I helped a family member select a new faucet for his kitchen reno.....


It works beautifully with the custom sink I had made for him earlier this summer and was just in time for the new counters to be installed.......almost done.  Sigh. : )


I headed north on a little road trip to survey this chink log home.  I'm re-designing its kitchen, 3 bathrooms, a lower level games room and,  cover your ears if you're a wood lover,,,we'll be painting out a LOT of knotty pine and giving this rustic home a modern edge.


The interior was a little slice of heaven for me, white, grey, and caramel wood tones, it just doesn't get any better than that for me.  A view into the master bedroom on the second floor, the chink logs are visible around the lower section of all the perimeter walls.  The plank floor boards are gorgeous and look stunning with the weathered grey logs.  To the immediate left is an ensuite which will get an overhaul.


A few irresistables at Angus & Company, (perhaps my favorite shop in TO) talk about wanting one of each...., yes please I'm so looking forward to fall!


Oversize bowls, fringe,,,,,seagrass.  sigh.


I'm wild for b&w accessories these, lacquered boxes look great in any room.


B&W pillow detail.


I've been craving hits of yellow since my trip out east,,,I found these silk pillows at a consignment shop the other day and I just might have to buy them for myself.  In fact they're much brighter than they appear in this photo, in person they're a vibrant canary yellow - I think they'd make any room sing.


All Photos:  Carol Reed


Saturday, July 17, 2010

Gail's Kitchen Reno: Post #3- Progress


Its been 3 months of debris and dust.....finally its time for all the new finishes and fixtures!

After 3 months of demolition and new construction we're finally getting to all the exciting finishing details at Gails' Kitchen.  Just when it seems like things are moving along at a snail's pace, suddenly you hit a point when everything starts to come together quickly with visible progress every day.  Its like Christmas morning each time I visit the site now!!  While the contractor's been working on the new construction I've been finalizing a few design details like the fireplace surround, ordering light fixtures, sourcing some new stools and finalizing the hardware selections.


A couple of weeks ago we purchased the Ikea cabinets which were delivered next day - EDIT:  for immediate delivery you have to pick the entire order in the warehouse yourself.  Otherwise for large orders you should have them pick the order for you which means allow at least 2 weeks for delivery of the order which comes from their main distribution warehouse.


My absolute favorite part of any job is when the primer goes up.  I LOVE to see the new space painted entirely white, in many cases its the only time I get to enjoy the beauty of the whiteness of the space before the clients 'colour' goes up!  Personally I always think the spaces look better in white,,,, but hey,,, its not about what I want because its not my house.


When the hardwood flooring arrived on site I handpicked all the boards.  I specified a character grade wood that has lots of knots but which also means you can get lots of variance in the appearance with some really odd ball pieces thrown in there too.  With this much character in the wood its important that the boards are thoughtfully placed or it could look like a dogs breakfast, so I sort them into 3 piles of bad, good and best.  Instead of tossing out the 'bad' boards I have the installer use them in areas where they won't be visible like under all the kitchen cabinets, under the appliances and under the sofa.


I sampled 7 shades of yellow paint before we could find one that we were happy with.  Yellow has to be one of the trickiest colours of all to get right, it doesn't help that I'm not a yellow person but I appreciate my client's attraction to it.  We applied each of the samples on three different walls and not only did the yellows look drastically different on each wall, the same colour often looked totally different on the same wall.  Looking at all these samples above, except for the two whites the others looked nothing like the paint samples in hand, NOTHING.  From left to right, bottom row we have; BM Creme Brulee, BM Creme Fraiche, BM Affinity Soleil, F&B Cream, F&B House White, BM Cotton Balls, BM Spanish White (LOVE), BM Ivory White (LOVE).  Top row is a second sample of BM Creme Brulee which looks nothing like the sample on the far left.  The homeowner didn't pick either of the ones that would have been my first choice but she's madly crazy in love with the one she did pick!


I was so excited a couple of weeks ago to meet the Coppersmith at the house and review samples of antiqued, hammered copper. He'll make the copper patina to our exact liking and then he'll use it to build us a custom hood canopy exactly like my design sketch - I can't wait to see it!!!!


But before the Coppersmith left the building,,,,,I lured him into the family room and pulled out my design sketches for the fireplace and asked him if he could use that same copper to make a surround for the new fireplace.  No problem he said, piece of cake.  Now, that's the kinda response I like to hear!!  So he'll be back to measure for the surround as soon as the gas fireplace box is installed.


Nothing gets my heart beating faster than found treasure,,, and an enthusiastic contractor. : ))  My clients are currently living in one of their own rental properties during this renovation and in the garage of that house we found stacks of antique wood boards from the previous owner who was a woodworker.  I couldn't believe my eyes when I saw these beauties piled up in the junk pile.  With their live edge and the gorgeous wood grain my mind was realing thinking of all the different ways we could use these.  I sketched up a detail for a sliding barn style door and Tom's going to have these boards made into an oversize door panel, and then,,we'll use the rest to make the mantle for the fireplace.


They started installing the base cabinets on Wednesday....


By Monday we'll be ready for the counters to be templated.  


Meanwhile the cabinet doors and drawer fronts are off getting sprayed a perfect shade of white.  Check out this post for all the details we have planned, and check out this post for step by step process of how I have Ikea cabinets custom sprayed (note this is not a DIY project!).


Stay tuned for more updates over the next 4 weeks as this dramatic kitchen, family room transformation comes to completion. 


All Photos:  Carol Reed

Wednesday, May 26, 2010

Gail's Kitchen Reno: Post #2 - Customizing Ikea


Gails' kitchen and family room renovation is a project of mine that's currently in the early stages of construction. I first posted about this kitchen and family room renovation a couple of weeks ago and if you missed it, you can go here to see all the before pictures and read all about the objectives for the redesign and the process behind developing the final proposed layout.  Here's another look at the new floor plan....


Its quite an extensive renovation with lots of new construction and reworking of plumbing and electrical so one of the ways to achieve everything on the wish list (quartz counters, high end appliances, all new floors, additional sinks, new fireplace etc. etc.) and stay within the clients conservative budget range is to use Ikea cabinets as the basis for the kitchen design.  In this post I won't bother going into all the reasons why this makes so much sense as I've written about all the reasons Why I love Ikea Kitchens here, and its for all those reasons why my client and I came to the decision to take this route for her new kitchen.   Also in that post you can find a list of my favorite ways to customize Ikea cabinets and give it a bespoke look - I'll be implementing all of those tricks in this installation too.   

When planning a kitchen based on Ikea cabinets I treat the base cabinetry like building blocks,,,or legos and configure them in any which way I need them.  There's really not too many limitations as they offer such a wide range of cabinet sizes and styles.  Since this kitchen will be more on the relaxed trad side than the modern side,,,,,I recommended the Tidaholm door style which is a simple shaker style door in natural oak.  As I've mentioned previously I prefer this door style over their other shaker door style the Adel, because the Tidaholm has a cleaner squared edge shaker profile and joinery corners.  Also its key, if you plan on painting the doors the oak doors take a new paint finish better than the Adel door style which is a synthetic polyester finish.  And for this project, we definitely intend on painting them!


The Cooktop Wall:  Essentially this is the main wall in the kitchen which houses the rangetop, exhaust hood and wall ovens.  This was a major change from the old kitchen layout which had a cooktop poorly (and dangerously) located on a narrow island.  I always place ranges or cooktops against walls where ever possible and try to allow counter space on either side.  In this configuration we have lots of extra deep drawers which will accommodate pots, pans, small appliances, mixing bowls, cookware, as well as spices, seasonings and utensils and knives.  The open shelves will house most of the dishware with additional pieces in the glass fronted hutch.  The shelves will provides easy access for Gail (who is a chef) who's always cooking for a crowd.  I've incorporated a desk space for her laptop, cookbooks, messages, and household bills.  I'm on the lookout for an old antique wall hutch that we could use above her desk surface but its not something you can easily find on a deadline, so in this elevation I've illustrated the backup plan which will be new glass fronted wall cabinets with a blue accent colour painted on the inside.  The range hood canopy will be custom built and we're planning on cladding it in an antiqued distressed copper,,much more blackened in appearance than shiny new copper.  (sorry but the colours depicted in this renderring are not quite accurate, the walls will be a very soft fresh pale yellow, all the cabinetry a warm ivory white).


The Island:  The sink side of the island is of course directly opposite the cook wall and despite how large the island is, I still couldn't fit everything in that Gail ideally wanted, but we're as close as we could get.  They'll be a Shaw farmsink, a second prep sink (that was a must!) and a set of refridgerator drawers.  Its these fridge drawers that really make her prep zone and cooking zone work efficiently, she can keep all her dairy and veg here, where they'll be right at hand instead of in the large main fridge.  The biggest challenge about this island has been trying to light it, you can't help but notice it only has a ceiling over half of it! The ceiling goes from 8' in the kitchen area opening up to 20' in the breakfast nook area so its a bit a challenge.  The situation just became more challenging when last week we discovered a new beam would need to be dropped exactly where I've got the light fixture hanging........


The Island:  On one end of the island they'll be another set of wide deep drawers and the other three sides of the island will be clad in a combination of operable doors and fixed door panels all finished off with a baseboard treatment around the bottom instead of a toe kick.  On the seating side of the island I'll be supporting the overhang with some simple corbel style brackets and also adding a small bookshelf unit with beadboard backing.


The Pantry & Bar:  Like the island, this section of cabinetry will be tricked out with additional trimwork to give it more of a furniture look, so in addition to the Ikea base cabinets the contractor will be installing beadboard back panel,,,corbel brackets and corner block details to the base, and built in recessed puck lighting.  I have to admit this elevation is a moving target right now,,,,its actually been changed several dozen times, probably 2 or 3 since this version was drawn.  The size of the wine fridge was the subject of many debates between my clients and my recommendation for a tall but narrow unit ultimately was vetoed for this double door style.  As for the cabinetry, Gail's been quite conflicted as to how much open vs. closed storage she can live with and I predict we'll be going back to one of the original pantry configurations I proposed which had more upper cabinets, less open shelving which will be more practical.   Right after this is posted I'll be working on one more variation of this wall.


Coming up next I'll share some images of the concept board for the space illustrating all the finishes and fixtures I've specified for the space along with some updated site photos.  

Next week I'll be writing a separate post outlining my tips and advice for painting your newly ordered Ikea cabinets based on the process I've used successfully.  I've had several people inquire about this so please know I havn't forgotten and I promise you'll see it next week.


All Images:  Carol Reed


Related Posts Plugin for WordPress, Blogger...