Monday, October 10, 2011

Thankful!


A lake side cottage, brilliant fall colours, clear blue skies and summer like temperatures.  An absolute picture perfect setting for celebrating a harvest style thanksgiving feast with family and friends.   Every fall at this time I declare that its my favorite time of year and this year was no exception, well, actually the weather, the setting, the company - it was all truly EXCEPTIONAL.   I was up north at my brother's cottage where we had invited a group of other family and friends on the lake to join us for a Thanksgiving dinner.  I was in charge of setting the table (actually nobody really had a choice, I called dibs on it weeks ago!!!) and I was thrilled to do it because often at my own home, this is the part of a holiday dinner that I usually run out of time to do.  But not this weekend, this was a leisurely day, dinner was pre-planned and well organized ahead of time so we were able to enjoy the company and the gorgeous warm summer like day. 


The sunlight illuminating the brilliant orange, red and gold leaves was the effect I wanted to create in a tablescape.

I had no idea how exactly I was going to set the table, I had no plan except that I would use whatever I could find on-hand both inside and outside the cottage.   We started by rearranging the furniture and setting up a long table down the centre of the cottage in front of the fireplace.   A mix of mismatched table cloths, runners, plates and stemware all seemed to work together with the fall colours.   Now the essentials were in place it was time to add some drama - my niece and I headed outside and collected a bundle of blazing red maple leaf branches and another bundle of golden yellow ones.  I placed three tall beaker style vases down the centre of the table and filled them with the long branches, we layered all the smaller off-cuts directly on the table itself scattering them down the middle from end to end. 


We gathered small pieces of birch bark and used them as place cards by writing names on them with an orange marker and setting one on each plate.  Lastly we scattered about a dozen votive candles down the table and set larger candle lanterns around the cottage.  The entire setting, including gathering the branches took less than an hour.


The effect was simply beautiful and dramatic, the tall branches created a brilliant canopy of leaves...


When seated at the table the colourful leaves glowed over our heads and all around the votive candles.  


We enjoyed the day outside, and had drinks and appy's on the deck overlooking the lake.  The sun was just setting as we headed inside.....from one spectacular showcase of colour...


To another.


Even though the weather was summer-like, we lit a fire in the fireplace, just for the ambience...


The drive home was full of breathtaking views likes this, we took the long scenic route home and soaked it all in.  In case I havn't said it enough times this weekend, its my favorite time of year!


HAPPY THANKSGIVING!


All Photos:  Carol Reed

Tuesday, October 4, 2011

70's Bungalow: Makes A Modern Impression


70's Bungalow with new front facade and door (new landscaping still to come!)

As you approach this door,,,,you can almost hear it say "Welcome! Let me introduce you to my stylish homeowners who will so graciously invite you into my warm modern interior......please come in...".   Its a far cry from what this front door used to say....


"Come in if you dare".  Front Door before.

When I began working on the 70's Bungalow project over a year ago I immediately saw such huge potential for the exterior.  What I disliked about the exterior of the house was its horrid fleshy peach coloured stucco (that's an understatement!) and its white vinyl slider windows. What I loved most about the exterior of this house were its lines, it had great long horizontal lines.  Everything about these lines screamed modern to me, they were just wanting to be heard.


To begin the transformation of the dated exterior the chunky traditional plaster mouldings were removed from around all the windows.  Next a new roof, and windows were installed.  Then new black aluminum windows were custom designed with an asymmetrical mullion detail. I had the front door and sidelite reversed (from the original positions) so the handle side of the front door wasn't up against the adjacent wall.  New lighting locations were roughed-in and finally a new dark grey stucco was applied to the entire exterior and the new eaves and soffits were fit into place.


The new look is monochromatic and distinctly contemporary.  I chose a black shingle for the roof and a dark warm grey not only for the facade of the house but for the eaves and the soffits too, I wanted these elements to blend in with the body of the house rather than be in contrast.  Not chosing white tones for the aluminum work created this monochromatic effect and emphasizes the expanse and volume of the house, not breaking it up with contrasting trim.   What I envisioned as the highlight of the exterior would be the front door.  All of this sophisticated grey and black was the perfect setting....


For a beautiful, solid, natural wood door.  The wood tones are a striking feature against the grey exterior and gives a strong presence to the entry.  Because the door location is a bit unconventional in that it doesn't face the street, (its positioned sideways/perpendicular to the street), it could easily disappear and become very nondistinct.  But I didn't want that - I like a house to have a definitive front entry that's distinguishable and also sets the tone for the interior beyond, even if its understated.  I talked the homeowners out of both a glass door and a painted door option.  I wanted to make sure this new door was in no way mistaken for a window or have the less important look of a side door.  Designing a new custom front door wasn't part of my original scope of work but as we discussed all the design details for the windows with the contractor the door design was created on the spot.  Oh how I love to hear the words "we can make anything you want, just tell us what you'd like".  So I did, and.....they did.  To finish it off on a truly collaborative note, the homeowners selected the new light fixture and mailbox. I approved.


After waiting months and months for the new door to be delivered - the homeowners and I unanimously declared it was worth the wait!  (the colours are a little off in the photo above).  Next year they'll begin the landscaping redesign which will include new stonework for the front entry area and a  new cladding treatment for the stone planters.  So please ignore all the landscaping (or lack of) in these photos as the grounds have remained unchanged to this date.   As for the interior, all construction work has finished up and we are currently working on all the window coverings and artwork.


Previous posts on this project:


All Photos:  Carol Reed

Wednesday, September 28, 2011

Gails' Kitchen: Sneak Peek


I don't think most people realize how much time will elapse from the day they decide to take on a renovation project to the day you can actually move your belongings back into the space, including all your own personal touches, and,,, begin living in it.   It can take even longer for the final finishing touches to be put in place and for those much dreamed about "after" photos to be taken.  Gail's kitchen was a project I started in January 2010, you can read all about the project and see before photos here, design drawings here , site progress here, and here. The project involved the renovation of not only her kitchen but an adjoining mud room and family room.   Construction wrapped up 10 months after my initial meeting with Gail, and just in time for her to use her brand new kitchen for Thanksgiving 2010.  But even at that point there was still a short list (ok, she might have called it a long list) of small details still to be completed. 

Flash forward almost a year later and I've finally had the chance to return to Gail's and take some 'after' photos.  (This could have happened sooner but coordinating shoots like this in the summer months is just too challenging.)  Its been an amazing experience to return all these months later and see Gail still gushing over her new kitchen like it was just revealed to her yesterday - she's literally giddy with disbelief and excitement that this is 'her' kitchen.  Its so satisfying to me to see the pure joy on her face when she's in this space and to listen to her tell me of all the parties and special meals that have been experienced.

Having any of my projects professionally photographed, or even photographed by myself, requires a huge investment of my own time (and money!) as well as the complete cooperation of the homeowner.  In all honesty its a challenge to find this time.   It can also take a couple of months to get into a photographer 's schedule depending what time of year it is.  Once scheduled,  prior to a shoot I'll spend a day picking up fresh flowers and food accessories and then I'll spend the next day at the house making sure everything is in place and camera ready.   The third day is spent at the house overseeing the shoot.  Did I mention,,,,,,,these after photos,,, require a huge amount of time!!??  

I was thrilled to work with the super talented photographer Donna Griffith just two weeks ago photographing 'after' photos of Gail's kitchen project.  I don't even have the final photos yet but I thought I'd share a sneak peek at some of the beautiful details that have come to life from all those design sketches and visions I had in my head almost two years ago.  Its a huge room and these images are literally a small 'peek',  capturing only a fraction of the complete space.

Please note the images below are just a few of my own candid shots, not the photographers.


Here you can truly see the beauty and character of hand made subway tile.


As Donna said when she arrived,,,,"I just want to sit down and have breakfast".  I bought the topiaries to dress the table but everything else I set out on the table belongs to Gail.


A huge oversize lantern I had custom made for the two story space. 


Even a year later the timing still wasn't ideal.  There was a construction crew working on the pool deck in the backyard but they were so accommodating every time we asked them to move their tools out of view! 


All Photos:  Carol Reed


Thursday, August 25, 2011

NYC: Wall Street Architecture


When I was in New York earlier this month working on the Upper East Side Reno I spent an afternoon walking around the financial district on a sweltering hot Saturday afternoon.   Although I happened to have my DSLR with me it wasn't a pre-planned photoshoot destination but once there I was simply overwhelmed by the architecture that surrounded me.   I had never been to Wall Street before nor did I know much about this iconic eight blocks except for the image I had in my head from movies, television and the media in general.  I've been to the city many times but honestly I had never really had any interest in visiting Wall Street or given it much thought at all (what can I say, I live in the world of Design not not high finance!).  You can imagine how ecstatic I was to discover this haven of architectural beauties.  How did I not know about this!?

Its difficult for me to find the right words to describe my impression of Wall Street,,,because it was so unlike anything I had imagined it was or expected it to be.  The sheer towering scale of the buildings viewed from the very narrow streets is sensational, the neighborhood is strikingly charming and quaint in a way (?) with its centuries old architecture, cobblestone walkways, a Tiffany's,  and the historic Trinity Church holding court at the end of the street.  The street is a pedestrian only zone with no vehicular traffic and facades are void of signage or advertising only flags, all this completly evokes a feeling of being in a world of another time and is so unlike a typical urban streetscape.   Since I'm really not doing a good job here of describing what I saw, how about I just show you a few of the photos I took.....


What I love about the buildings here is that the colours are all so grey toned that even when you shoot and view the images in colour its very monochromatic looking.  All the images above are shown in colour except one!


I'm a complete amateur photographer but it is a passion of mine.  I love to shoot landscapes and streetscapes particlarly, I don't use photoshop or edit my photos in any way except to convert to black and white or crop images.  When I want high quality prints made for framing I send the image off to Elevator Digital and they take care of all the technical issues for me (resizing etc.).  Mostly, I like my images to remain true to the way I shoot them without any enhancing or special effects.  Sometimes I like to shoot slightly overexposed, sometimes underexposed depending on the mood I'm trying to capture.  What I love to do with my photos the most is have them printed and framed for wall art, sometime for myself, sometimes for clients.  When you frame an image it takes on an entirely new dynamic, I'll be getting several of these printed and framed and they'll be something like this...


Unless I'm doing one large oversize print, I try to group images into groups of 2, 3 or 4's combining both landscape and portrait orientation as I did above.  Once I've decided on which images I like grouped together, I'll decide if I want them printed in black and white or colour.....


....and then I figure out my final image sizes, matt sizes and decide on frame colour by doing mock-ups similar to these (very rough above!), often I do this on a scaled elevation of the wall and I'll normally include the frame too (not shown on the above).  For frames I always do a simple rectangular profile in white, black, silver or natural wood.  Lately I've been doing a lot of white framed coloured photography, which I LOVE.  Then once all this is figured out I send the original image files off to Kevin at the printing lab who takes care of printing, matting and framing for me.


If you ever visit NYC I highly recommend a visit to this neighborhood whether you're passionate about architecture or not, its simply an experience like no other.


All Photos:  Carol Reed

Monday, August 15, 2011

A Family Home Office


Many months ago just before the end of 2010, a past client of mine contacted me about finishing one of the remaining 'original' rooms in their otherwise fully renovated cape cod style house.  This room was the Library or Home Office and it occupies a very prominent space in the home at the front of the house directly off the front entry.   The parents are both successful professionals with their own practices/business and have two young girls.  This room needed to function as a home office for both parents and space where both girls could work on school projects with mom or dad.   It was a tall order!   Home offices have similar needs to address as kitchens,,,lots of worksurface, storage, organization, ergonomics, and the ability to accommodate equipment and work gadgets.   Here's a look at what one corner of the space currently looks like - its obvious that nothing is working here.
  

Existing space

The solution to a space like this is built-ins.  Built-in cabinetry that maximizes the vertical space available and accommodates specific types of storage needs.   I designed 3 walls of full height built-in cabinetry for this room to provide worksurfaces and accommodate lockable file storage, computer equipment, supplies, binders and a book collection.   To soften all this built-in cabinetry I decided to add a custom made free standing table desk, an area carpet and some patterned fabric to give the room a more relaxed homey look and make it feel less 'officey'.   All these months later, the cabinetry is now nearing completion, the custom table desk and fabric treatments are being made, and installation is scheduled for sometime in September.

The concept board above is a look at some of the key pieces selected for the room early on in the planning process - in addition to these pieces an area carpet, upholstered arm chair, wall art and desk lamps will be sourced for the room over  the next few weeks.    Below is a floor plan of the proposed new layout with built-ins.


I presented at least 4 different layout options for them and this was the winning plan.  The table desk could easily accommodate mom and one or two of the girls working on a project.  There's additional knee space on the side return, loads of file storage, a wall of bookshelves, a separate area for printer/fax/copier, supplies and stereo equipment.  Dad has his own separate work space complete with a loads of upper cabinet space for all his paper work.


The room's two windows will get new fabric roman shades with a wide gros grain ribbon border (along the edge as opposed to inset as in the sketch above).  A custom upholstered stool will tuck under the knee space of the long wall of built-ins and can be pulled up to Mom's or Dad's desk when needed.


The fabrics for the roman shades and upholstered stool shown above right and the cabinetry finish is on the left.  The base of the table desk will be painted in a dark navy blue/green.


I first saw this fabric about a year ago, I photographed it and ordered a sample for future use.  Well it didn't take long for this project to come along and I knew instantly it would be a great fit for this space and suit the classic casual vibe of this client's home.  A pattern that's not too over the top flowery, it's very branchy and leafy and has the odd bird in there too.   The existing paint colour of the office is a pale warm yellow/green that's also found in this print.


I was thrilled when I spotted this room in the July/August issue of Veranda Magazine with the same or similar fabric.  I love the impact it has when used on all the upholstery and drapery.  I'm not certain its the exact same fabric, the colour way is slightly different with a gold/tan background as opposed to the blue/grey background of the fabric I selected but its so similar its hard to tell the difference.  I also noticed that they brought in a hit of tourquoise in the accessories just as I did with the gourd lamps,,,and I think its a fun compliment to this fabric choice.


With the new school year fast approaching this new home office will be ready just in time to help this busy family tackle all their work and school projects with ease.   I'll post some after photos this coming fall and show you how it all comes together.  


Photos 1 thru 6:  Carol Reed
Photo 7:   Veranda Magazine


Wednesday, July 20, 2011

New Project: NYC Family Apartment


I can't even begin to describe how wonderful my newest client is and how excited I am to be designing her 'new' family home, a 4 bedroom, 4 bathroom apartment in the Upper East Side of Manhattan.  To say I'm 'excited' is an understatement actually,,,it is a privledge to have the opportunity to redesign a family home, its the ultimate for me - creating the partition layout, planning out the kitchen, designing the bathrooms,  determining how the spaces flow from one to the next, how the rooms relate to each other, how they'll be used and how the family will interact with each other and their guests.  Selecting all the materials and finishes, designing all the special details to reflect their personality and style is truly a joy for me and every moment, every step of the way I envision the family's day to day activities and even more so (!) I envision, down to the smallest detail, all the special time they will enjoy in their home with family and friends.  Enhancing the function of these mundane daily routines as well as all those special occassions informs every design solution and decision.

Although this is a first for me, designing a home located in NYC,,,the design process is really no different than any other.  The family requirements and needs are very much the same as any family and the space challenges are similar to those faced by anyone living in small urban homes.  Some might not call a 2200 sf apartment in NYC small,,,but for a family of 5, with no outdoor space, no basement, no garage and frequent out of town guests,,,,it can quiet easily feel small - every inch is precious.


The street view


What is unique about this project is that the project involves combining 3 individual small apartments into one large apartment suitable for a young family of 5.  Of course being a high rise building there are the usual concrete floors and ceilings to deal with and the typical awkwardly placed obstacles like columns and plumbing stacks, intercom panels and such that can't be moved, these are expected and come with the territory.  I've never met a column or a vertical chase that I can't work around, in fact I ENJOY the challenge, they demand creative solutions.  In this building what's even more of a challenge is their strict wet over wet regulations, meaning you must keep all plumbing fixtures located in existing wet zones (ie; kitchens or baths must be installed over and within the footprint of another bathroom or kitchen only).  This makes it a bit challenging to expand the size of a bathroom or kitchen,,,imagine the existing bathrooms and kitchens designed for small 1 bedroom apartments are the size of closets so they obviously don't fit the needs of a larger family home.   But even that,,,,even that challenge I'm confident can somehow ingeniously be solved.  What's MORE of a challenge than all of the above, is actually getting your proposed plans approved by the Building Management.

Its been over 4 months since the homeowners made their first drawing submission to the board for approval, via an Architect, (long before i was on board) and many versions, concessions and submissions later,,,,they haven't made much progress.  The board hasn't approved what's been proposed to date so I'll be attempting to rework the plans and come up with some solutions that hopefully will meet with their approval,,,and are still functional, you know for a family of five as opposed to 3 bachelors.

To get this project started I flew to NYC just a couple of weeks ago to meet my new client for the first time and see the apartments in person.  We discussed her vision for the space, her style preferences and all of her family requirements and we were completely on the same page - a great place to start!  I had a good visual of the space already as I had a set of plans and had already done some space planning, primarily I wanted to see the space to verify dimensions and document the existing elements I'd need to work around.   The apartments are in a 1960's building and all three of the units are in fairly original condition with the exception of one unit that has some 1980's upgrades.  Yikes.  Kudos to my clients for being able to see the potential in these 3 separate units.  Without a doubt the location was the main selling feature - and its stellar, situated in the mid 80's between Park Ave. and Madison.  Below are some pics I took of the space.


Windows are all along one side of the apartment(s) and this is the typical scenario.


The ceiling height is a nice 9' throughout most of the units.


One of 4 bathrooms, this is the most updated of them all.  Despite how 'trendy' blush tones and brass are right now, this unquestionably screams 80's.


There is one other bathroom just like this and a fourth (master ensuite) that will be created in what was once a kitchen.


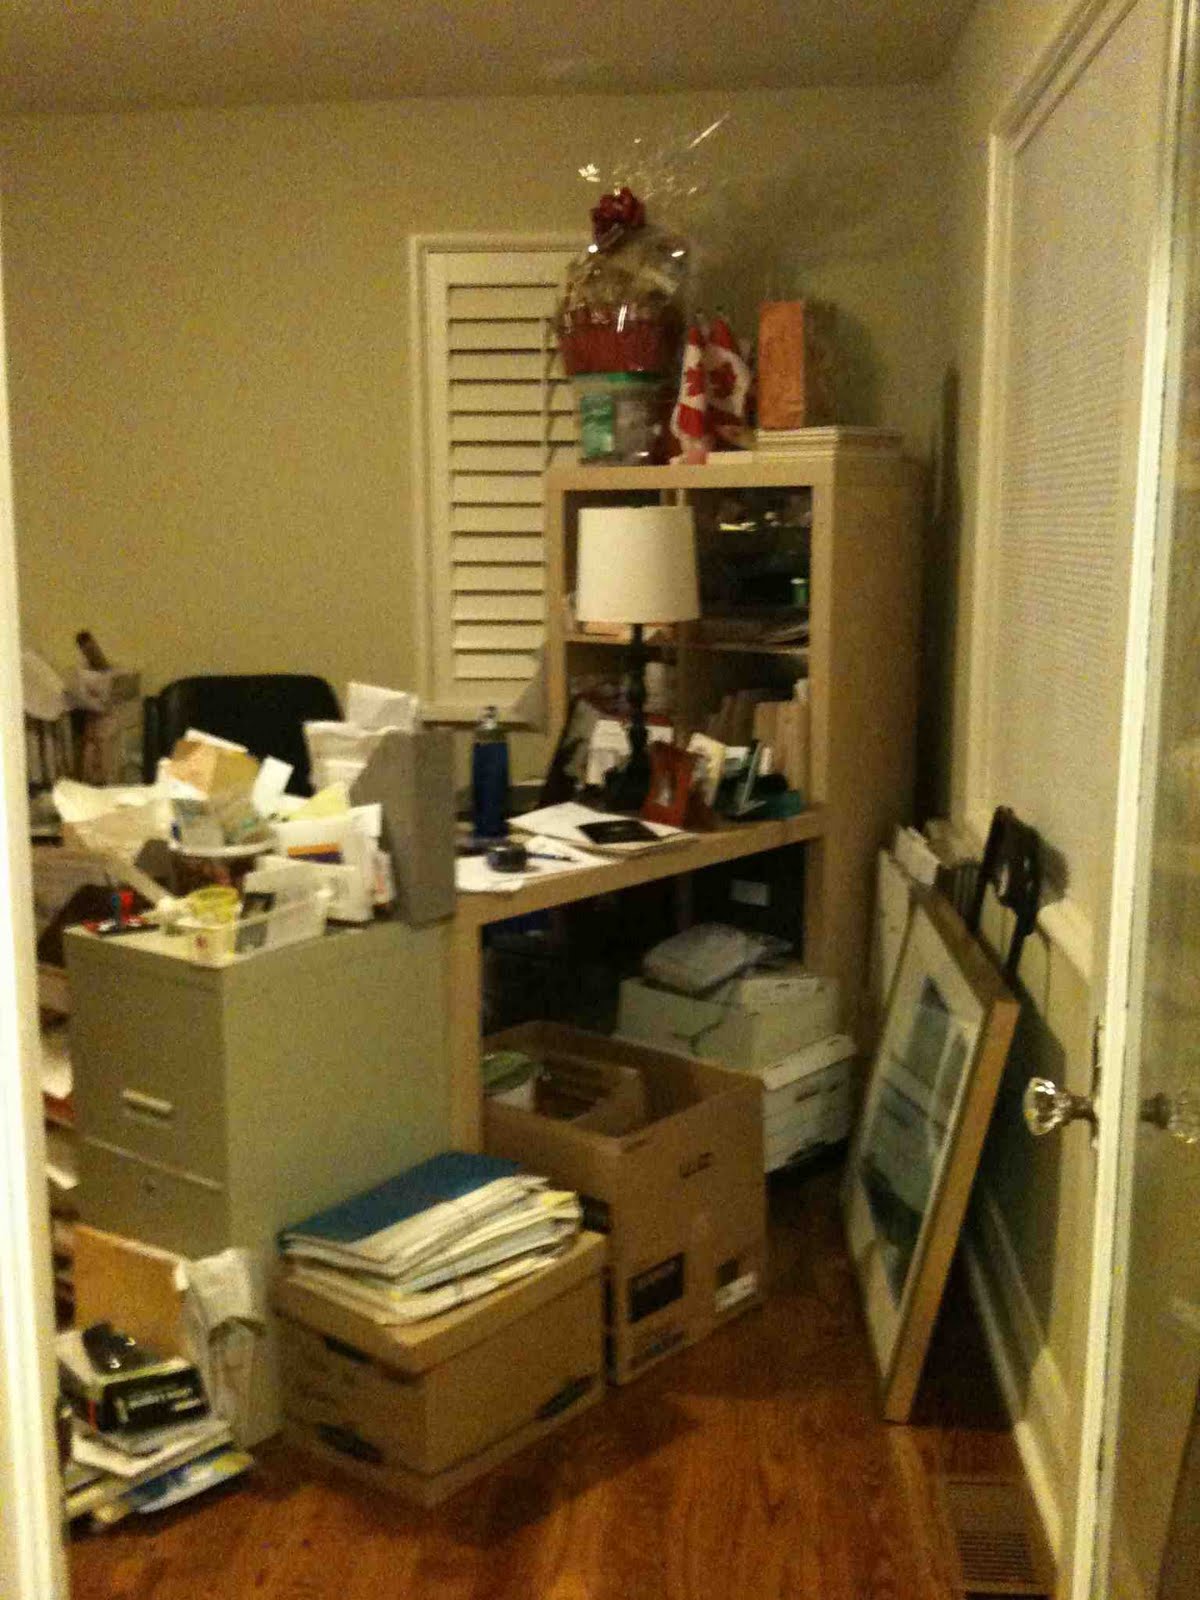
Bulkheads everywhere, this looks like a big closet until you open the doors.  This space under the bulkhead will actually become a desk in what will be the childrens play area.


This is one of three kitchens, and it will be completely removed.


This existing kitchen will become the new kitchen, the intent is to open it up and expand it, however, the 'suggested' expansion plans are not going over so well with the Board.  : /


The biggest obstacle of all is this very large column which houses telephone cable and the electrical panel and it falls right smack dab in the middle of the proposed new kitchen.   Its not visible in the kitchen photo above, its on the direct left of the doorway.


When I look at these photos I can't help but feel overwhelmed with excitement about what an enormous transformation this will be.   To take an outdated and depressed space and turn it into a beautiful home full of life and love is a definite thrill for me.  I can't wait to show you the plans and the "New Traditional" design direction we're headed in.

At this point we're awaiting another pending decision from the Board which will determine whether the Architects proposed solutions to expand the kitchen area and master ensuite area are a go (waterproof membrane and exhaust issues), if not, I've prepared several alternate layouts that we'll fire right back at them.  If none of those plans meet with their approval, I'll need a magic wand.   


All Photos:  Carol Reed

Monday, June 20, 2011

Mentoring


On Saturday afternoon I received the most beautiful bouquet of flowers and hand written note I've ever received.  I was completely surprised and touched to learn that they were from a design student who I had mentored this past school year.  When I say mentor I use the term loosely, she was well on her way with her final project before we even met for the first time.  Seeing what she had already accomplished and the direction she was taking was impressive,,,the complexity of the project she had taken on was ambitious and would be a challenge for an experienced professional let alone a student....but she didn't seem intimidated in the least.

Midway thru this semester Lisiane was hitting a road block trying to define and grasp 'concepts' and how to successfully develop one for this design project.   Co-oincidently I remember it being the one thing I had the hardest time understanding when I was in school too so I really related to where she was coming from.  Of course now its something I fully understand on a level that's very intuitive - I believe a design concept stems from your clients lifestyle values (or business/product brand philosophy) and is developed and implemented thru your point of view as a designer.  As a student you really haven't developed a strong point of view yet and your client is often completely hypothetical so hence the road block.  I tried my best, at length, to explain this very abstract creative thing we call 'concepts' to her by relating it to real life examples that I knew she could relate to, both good ones and bad ones.   (possibly a future blog post?)

Anyways, I was thrilled to hear Lisiane pulled her project together with excellent feedback.  As she wrote to me "your ability to explain things so clearly when my instructors couldn't is what helped me pull the project together".  There are many abstract aspects of the design process that are difficult to grasp in classroom situations, so mentoring or interning with an experienced professional is a really important part of the learning process.

So now here she is thanking me for helping her and here I was feeling like I hadn't really been much of a mentor to her at all.  I realize now though that by just simply being available to listen and provide some practical advice and guidance can make a world of difference to their otherwise purely academic approach.  I learned from this experience that as professional it doesn't take much time to share some advice and encouragement with students so if you are ever in a position to be able to mentor one I hope you embrace the opportunity to share your knowledge and point of view and enjoy how rewarding it can be.   It feels great to receive notes like this..."Your warm and approachable personality has put to rest any misconceptions I've had about Designers".   

Congratulations to you Lisiane, I'm so happy to have been a teeny tiny part of what I know will become a very successful career for you as an Interior Designer.  Thank you for taking the time to make such a thoughtful gesture, you're note was heartwarming and the flowers are simply beautiful!
Related Posts Plugin for WordPress, Blogger...